Showing posts with label repair. Show all posts

Thursday, August 15, 2013

Fixing a floppy magnifier lamp


My dad (RIP) left behind an old, crusty, but good magnifier lamp with a floppy head that he'd shimmed with neoprene and paper. After the zillionth time the lamp head flopped down while about to solder a tiny electronic component, I decided to do something about it. Here's how I fixed it.

Friday, March 1, 2013

Ken's Droid Incredible Repair

Ken at Over Engineered blog describes briefly the process of repairing a cracked Droid Incredible screen. The post includes a link to a youtube video with instructions. Enjoy!

Wednesday, January 23, 2013

Fixing a Leaky Refrigerator Water Dispenser

Picture from Over Engineered

Ken over at the Over Engineered blog posted a great article on repairing a leaky refrigerator water dispenser. He traced the problem to a leaky solenoid and talks about how he fixed it. Neat.

I'm due to repair my ice maker one of these days. I'll be sure to post up when I do.

Monday, October 1, 2012

Trash Can Wheel Repair

My wife ran over our trash can which was unharmed except that the wheels popped off.

I needed to pop the axle back into the slots. I gave it a go but it was too hard. I tried again, and again. I pried the slot open with a screwdriver, and pushed down really, really hard. Pop. Trash can fixed.


Don't give up. If things aren't coming together, remember there's usually one easy way to fix things and a lot of hard ways to fix things. You just have to find out what the easy way is.

Friday, September 21, 2012

Fixing a Logitech Mouse Scroll Wheel

picture from  http://basejewellery.com.au 
Originally found on Hackaday, here's an article on fixing a Logitech mouse's scroll wheel by refitting it with titanium scrap from his ring-making.


Wednesday, August 1, 2012

Fixing a Thermos Lunchbox

What Dad's Thermos lunchbox used to look like (not his actual lunchbox)
My dad, Melburne Shimniok (he passed away in July of 2011) is the one who taught me how to fix things and I wanted to share some of his fixes and inventions, starting with his old insulated Thermos lunchbox. 

An insulated Thermos lunchbox; came with drink container
I remember as a kid seeing this old Thermos lunchbox every day he'd go to work at the sheet metal factory. Well, somewhere along the way he crushed it and cracked the end off of it.

Can you tell that my dad liked bananas?
Dad grew up in the depression and wasn't one to throw things away easily. He kept this lunchbox for at least 35 years. He fixed what broke instead of throwing it away. I try to do that too.

Using a sheet of aluminum that he cut and bent to fit in the hole, Dad pop-riveted the metal in place, then bent and pop riveted a bracket on so the clasp would still work. He used it like this for many years. I don't even remember a time when it wasn't in this state of repair.

Pop rivets aka blind rivets
Pop rivets are one of the earliest fasteners I remember learning about from Dad. They are simple to use, hold permanently and look cool when you're done. They're particularly useful when the back side of the materials to join is difficult to access; that's why these are also known as blind rivets.

photo: www.bayrivet.com
You drill a hole through two or more materials, stick the rivet side of the pop rivet into the hole, then insert the shaft into a special pop rivet tool. Squeeze the handles a couple of times and it pulls the shaft, which pulls the secondary head and deforms the back side of the rivet, clamping the materials. Finally, the shaft pops off (hence the name) and you're left with a nice rivet.

Friday, October 1, 2010

Fixing a Cordless Drill

DeWalt DW953 Drill
I have a DeWALT DW953 cordless drill and it's seen a lot of use over the last 15 years or so.

Recently, the speed selector / gear shifter broke (see picture to the right; small black part top center) rendering the unit useless.

The shifter mechanism had been growing stiffer and more difficult to use in the year or two prior to its failure.

Rather than throwing it away, I thought I'd try to fix it and get another 15 years of life out of it. Here's how I did it.

Summary
The factory part is no longer available for purchase, so I had to fabricate a part that would serve the same purpose using readily available material and a minimal set of basic hand and power tools.

Factory Parts?
Factory replacement parts are always a good option versus fabricating or hacking your own fix. It's easier and doesn't usually cost much. I started at DeWALT's parts page. From there to the DeWALT service net which allows you to find parts for this and other brands: Porter Cable, Delta, and Black and Decker. I found the exploded diagram.

DeWalt DW953 Drill Exploded Diagram
DeWALT DW953 Exploded Diagram

The broken part is #9, the "SHIFTER", and is no longer available. Probably because it was poorly designed and all the spare parts stock burned up a long time ago.

DeWalt DW953 Shifter
The Shifter

The shifter is a piece of plastic which engages a C clip (the curvy wire thing extending from the rectangular part 9 above) to move the shift collar in the drill. Part 10 is a detent spring that locks the shifter in the high or low position. You can see the C clip below and you can see the channel that part #9 rides in.

DeWalt DW953 Cordless Drill Shifter Repair
Note shifter wire (C clip) and channel for part #9
Shifter Details and Failure

The shifter is a piece of plastic with a channel in it, into which the C clip fits. The channel essentially broke in half as you can see below.

DeWalt DW953 Cordless Drill broken shifter
The shift selector split in half

Options and Solution

I could have used plastic glue to repair the part. I've used plastic glue before with some success. But I don't entirely trust it for high stress areas and the design was already weak when it was a solid piece of plastic. A glued piece of plastic might not hold well.

Epoxy can make strong repairs and may have been a good option, provided both halves and the wire C clip were all glued together with a big blob of the stuff. This would've strengthened the area and it may have survived for a long time. But not as long as metal.

Instead I chose to crudely fabricate a replacement out of aluminum. Any of us mere mortals without a CNC machine in the garage can replicate this work with basic hand tools.

DeWalt DW953 Cordless Drill Shifter Repair
Broken shifter at top, two-piece fabricated shifter in the middle.
Making a Replacement

I made the replacement out of two pieces of aluminum arranged in layers. The top layer slides in the original channel in the drill's body (below).

DeWalt DW953 Cordless Drill Shifter Repair
Channel where shifter slides. Some material had to be removed. 
The bottom layer (right) has a slot to hold the C-clip. The slot has to be only just wide enough to hold the C clip rigidly upright so it can shift the geartrain of the drill.

DeWalt DW953 Drill fabricated shifter
Top layer (left) and bottom layer with slot (right)
The top layer (left) has a relief cut to let the c-clip fully seat into the bottom half slot. I cut the slot in from the side as that was the simplest approach.

DeWalt DW953 Cordless drill fabricated shifter
Bolted together
The layers are bolted together. I used a tap to make threads in the bottom layer. A bolt with two nuts serves to hold the pieces together and provide something to grab to select the drill's speed.

DeWalt DW953 Cordless Drill Shifter Repair
Finished and installed

I also had to remove some material from the drill body, specifically the channel in which the part slides. Otherwise it was a pretty straightforward process.


The Results

How does it work?  The first iteration didn't work well as I positioned the knob/bolt in the wrong spot.  The second time around I got it right. Shifting has never been smoother.

Which is good but also bad. There's no longer a spring to make the shifter click and stay in place. It slides so easily that the shifter will slide forward and backwards just with gravity.

I'll figure out a fix for that one of these days... But at least I have my drill back.

Batteries

I'm due for new batteries, however. I am thinking of getting rebuilt battery packs rather than buying new. I looked around and I think I'll go with Voltman Batteries. We'll see.

Wednesday, September 1, 2010

Fix a USB Mouse Cable

broken mouse
Cheap mouse, bad cable
I bought these cheap $5 optical computer mice from a local computer store (CompUSA, when they still had storefronts) several years ago. They've held up great to daily abuse but after awhile, one of them started disconnecting itself if I moved the mouse in certain positions. One of the wires inside the USB cable had broken.

Sure I could throw it away like everyone else and add yet more crap to the landfill. Or I could pull the ultimate "in your FACE, throwaway society" move and actually repair an ultra cheapo piece of disposable modern technology. Well, obviously the latter was my choice.

Ha. Take that, throwaway society!

Identifying the problem, it was pretty clear from bending the wire with the mouse plugged in that the break in the wire was very close to the mouse body itself.  I'd have to cut out the bad section of wire. Easy.

First, take apart the mouse. Most look pretty similar inside. A small circuit board with optical sensor, USB chip, etc., to which the USB wires are soldered, an optical sensor on the board. Couple of buttons, scroll wheel, etc.

repairing broken USB mouse cable
The exposed mouse guts. USB wire at top, sort of left
Next, cut off the bad part of the wire, desolder the end of the bad wire off the board, making careful note of the position of each of the colored wires.

repairing broken USB mouse cable
Newly stripped USB cable with color coded wires re-soldered
You might consider knotting the wire to prevent it pulling out of the mouse housing.  Now, strip the remaining good wire outer jacket.  Then individually strip a short section of each of the wires, and resolder to the board. Reassemble the mouse and you're set.

I didn't bother with the strain relief at the mouse body. A blob of RTV would work but I think it'll be fine as-is. There, that's all that it takes to repair a bad mouse wire!

Sunday, August 1, 2010

Fixing Another Chair

I never realized how much I rely on my office chair's arm until the thing came off. I'm not throwing out the chair for something that is this simple to fix. That would be absurd. Yet I'm sure people do just that all the time.

Here's what I did to fix it, so you can keep your chair if something similar happens.

First you have to figure out the broken item in question is constructed.The arm is attached to the back with one bolt through the back frame. It screws into a threaded insert in the arm. The arm attaches to the seat with two bolts and two threaded inserts.

Two threaded wood inserts attach arm to seat

Threaded insert

Next, figure out the root cause. I tried simply reattaching the arm but it didn't work; the threads seemed stripped. Further investigation revealed something else going on.

The bolts in the seat didn't extend out very far at all. As a result, they engaged only the first couple of threads in the inserts and those threads finally gave way.  Either the countersunk holes in the seat weren't drilled deep enough, or the bolts weren't long enough (maybe I used the wrong bolts when I assembled this thing?). Fortunately, the bolts at the back do extend far enough and fully engage the inserts.

Bolt is too short to engage threaded inserts

Finally, evaluate repair and redesign options and pick the one that best meets your needs. I could have gone through the trouble of drilling the countersunk holes deeper.  But why not just install longer bolts for a minimal cost (if you don't happen to have bolts of the right size and pitch)?


Well... that was easy.

To prevent a similar failure on the left side, I swapped those bolts too. Thread locking compound on the bolts will hopefully prevent them from backing out.

This chair has been in heavy use for five years or so.  Aside from tje finish fading in a few spots, you may have noticed that the seat (is it leather or is it naugahyde? or pleather?) is cracked and coming apart. Clear packing tape is holding it together for now, but a recover and repadding is in order. My butt will thank me.

Thursday, July 1, 2010

Fixing a Chair

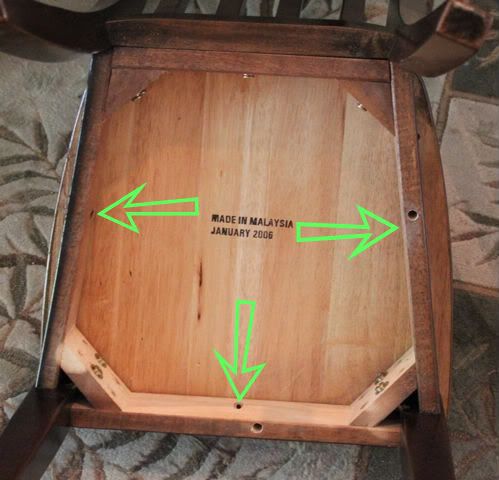
One of our dining chairs' seats came loose.  I guess if they still had it in stock we could've bought one. But fixing it was easy and only took me about 20 minutes.  Here's what went wrong.  The seat is attached to the chair frame with three screws in pocket holes (arrows, below).  Two of those three screws stripped loose from the wood and so the top was loose.

Arrows show pocket hole locations

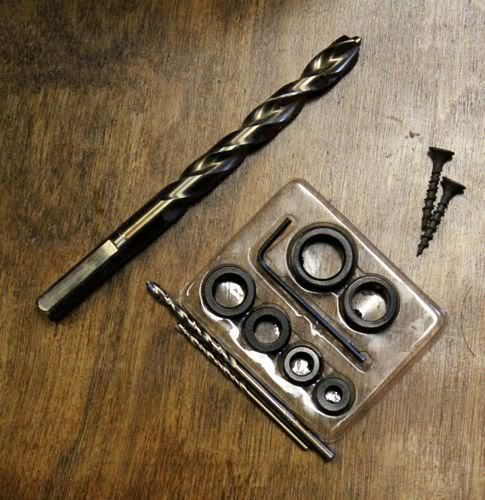
I don't have a pocket hole jig, so the next best approach was to drill vertically through the 4" deep chair frame. However, the screws I have aren't long enough to go all the way through, so I needed to drill a large countersunk hole, bigger than the screw head, and drill a smaller concentric hole through which the screw shaft would pass and finally drill a small tap hole in the chair seat.  Drill stops make it easy to ensure the right depth of the larger counter sink hole.

Screws and tools required: drill bits and drill stops

Most drill bits don't have pilot bits on the end, so your best bet is to drill the small hole first and then drill the countersink using the first hole as a guide.  Or, use a Forstner bit with a spike on the tip, or as I did, a bit with a pilot tip, and use the small center hole these bits create as a guide to drill the smaller hole.  Position the chair seat, screw the screw into the chair wood a little, to create a mark, then drill the tap hole into the chair seat.  Now fasten the two parts together.  Below is the countersink hole offset from the pocket hole.

Pocket hole, top; countersink hole, bottom

Saturday, May 1, 2010

Fix an Old Solar Calculator

Casio solar calculator repair
Trusty Casio Sci Calculator
I wonder how many calculators get thrown away every year?  Rather than pitching it, I'm going to give my trusty old scientific calculator some TLC and extend its life another couple of decades*.

Though worse for wear, I've had this Casio fx-115M solar-powered engineering calculator since I bought it new around 1988 for Electrical and Computer Engineering 101.  That's 22 years ago as of this writing. Dang, I'm getting kind of old.

Anyway, it served me well through college and continues to be my go-to engineering calculator for many of my hobbies and projects like robotics, electronics, home repair, mechanical repair on the Jeep and more.

Early on in it's life, the calculator's critical inverse key tore loose. I replaced it with a carefully cut piece of eraser which remained in place all these years despite constant use. The fix worked surprisingly well, believe it or not. Even so I decided to "upgrade" to a newly and squarely cut piece of white vinyl eraser. (I spared no expense on this repair!) :)

Casio solar calculator repair
The inverse key was replaced around the time the web was invented.
The screen is pretty scratched up. Some day when I finally get a buffing wheel I'll polish it back up again, a technique that should work for most plastic faceplates on a variety of products.

And with a little Goo Gone, I'll remove the Professor Fahey's sticker (verifying it is not programmable and ok for use on ECE exams). The stuff works wonders at removing many kinds of adhesive residue.

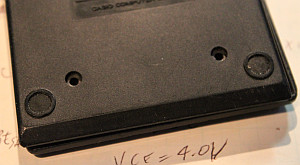
Several years ago, the battery backup function stopped working. The other day I finally got fed up and decided to fix it.  I removed the two screws on the back of the calculator, carefully unlatched the tabs holding the shell together (actually one tab was broken).

Just two screws. Easy!
Casio solar calculator repair
Battery, holder, negative, and positive clips.
I found a small battery labeled National GR927. This link says to use a common 399 Silver Oxide battery, which I found at Radio Shack. With the battery reinstalled it will remember what "mode" it was in when I turned it off, eliminating my only frustration with the calculator.

When done, this old calculator will be good as new for another two decades. By then we'll all have brain implant calculators, I'm sure...

...with no inverse keys that tear loose.


* Why did I keep this antique calculator all these years?  What features would possess me to hang onto it, or for that matter, what would possess Casio to continue making it, in an upgraded fx-115MS form?  A short list of feature I like:
  • ENG button converts to engineering scientific notation: kilo, mega, milli, micro, pico, etc... extremely handy for electronics
  • It does math on fractions. No, not decimals, real fractions!  Enter 1/2 + 1/3 and it gives you 5/6.
  • Does binary, hex, and octal conversion and logic operations--helpful for programming geeks
  • Does degrees, minutes, radians math
  • Change precedence with parentheses
  • Does combinatorial math
  • Does factorial math
  • Does inverse trig functions -- give it a ratio, it gives you the angle.
  • And a bunch of stuff I've never used like standard deviation 

Tuesday, September 8, 2009

Lamp Repair

Lamp stopped working? Knob popped off and can't secure it again? What piece of junk, right? But not the kinda junk you toss, the kind you fix. One of our floor lamps had a socket that went bad right after the knob cracked and fell off. But it's a nice looking lamp, and I wasn't about to trash it!

I did a little web searching to see if I could find instructions for how to replace lamp sockets -- yeah, they are out there. You can do your own search, or find a book at the hardware store, etc. You'll want to follow reasonable, sensible precautions to work safely and to repair the lamp to a safe state.

In my case, just the socket itself was bad, though I bought the entire assembly from the hardware store. They are pretty cheap so no big deal.

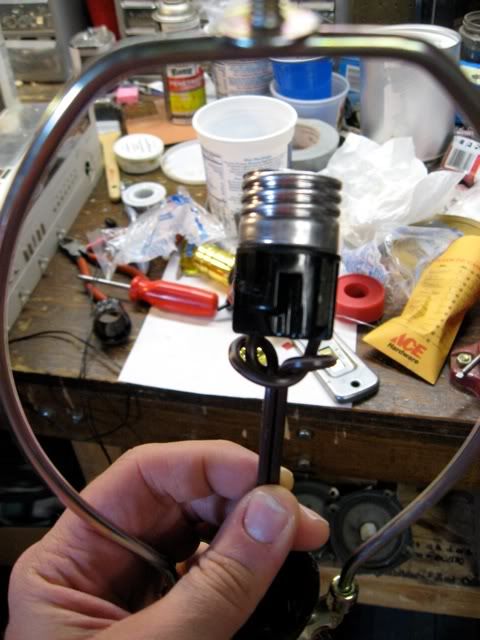
Fixing was just a question of unscrewing the cap over the socket, pulling the socket out of the lamp (feed the lamp cord into the base to give some slack), and then swapping in the new socket -- after pulling that socket out of its assembly.


I preferred to swap one wire at a time to ensure the right wires remained on the right screws/tabs of the new socket. You'll probably want to make sure you get the same kind of socket, too -- like, 3-way vs on/off, same watt rating, etc.

Wednesday, July 8, 2009

Laptop LCD Screen Repair

You can get more use out of a laptop with a broken LCD. Here's how.

I recently got an old, broken laptop from a nice fellow off of Craigslist. Fortunately he'd just kept it around instead of throwing it away (too many toxins in electronics equipment to do that!)

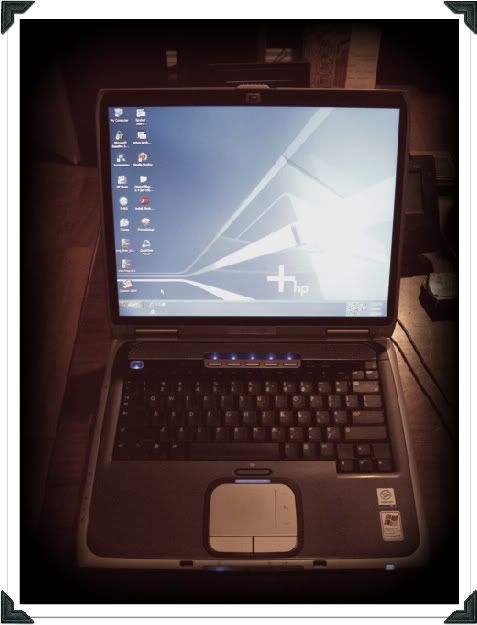
The machine was in good shape, save for a broken LCD screen. Fortunately, this is a pretty easy fix. New LCD screens can be found on eBay for around $60 and on the web for a little over $100. (Seems to me this fix could remedy a broken desktop monitor's LCD screen, too.)

So, before we dive in, you may wonder: is it worth fixing a 5-10 year old PC? I say YES! I find that you can squeeze quite a bit of extra life out of your old PC or Mac, depending on how you use it. And that's a topic for a later blog post. Back to fixing...

Removing the Screen

Here's a quick overview of the repair and some important lessons learned. I went through some pain fixing this thing, so hopefully you can learn from my mistakes.

First of all, removing the screen is a question of removing the laptop's screen bezel, disconnecting the outer casing from the frame, and then removing the LCD from the frame.

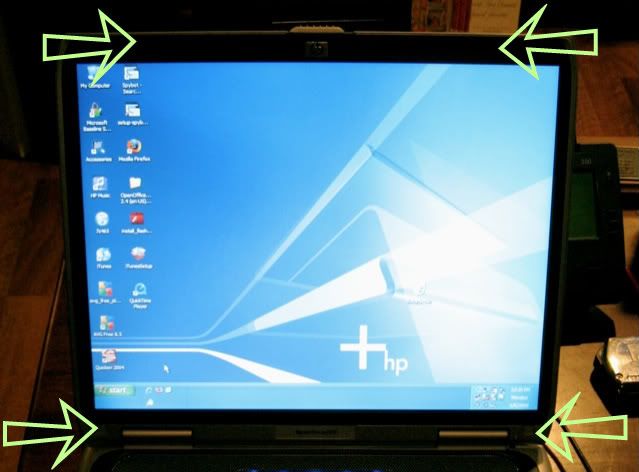
On this particular model, an HP Pavillion ZE4900, two stickers and two small rubber bumpers cover screws that hold the bezel to the screen frame (see pic).


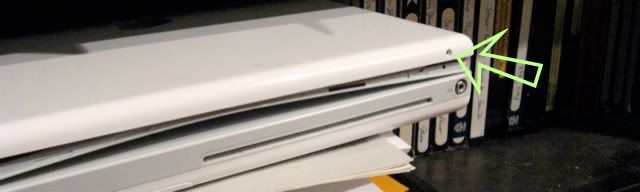
The Dell Lattitude D630 I use for work is similar. My older iBook has frame screws on the side of the housing (see picture).

On the HP and Mac, the screen frame consists of two vertical metal channels, one on each side of the screen. The LCD is screwed to the frame on the side at the four corners, but to get to those screws on the side, you have to remove four other screws that hold the frame to the outer casing.

Finding the Right Replacement Screen

For me the big challenge was finding the right LCD screen replacement part. The original was an LG Philips LP150x08(A5)(N1). I had hoped one could cross reference other manufacturer's part numbers and find an equivalent replacement, but I wasn't able to find a cross reference database.

Finding an exact replacement with the exact same OEM part number ensures a hassle free fix, but you may have to way awhile to find the part on that famous auction site, or you may have to pay more to get exactly what you want.

I suppose it is possible that you can get away with a similar model number. In this case, for example, maybe an LP150x08(A3) or LP150x08(TL)(A2) would've worked. I have no idea.

On the other hand, finding an equivalent may mean you end up buying one or more parts that don't fit. You can resell them, as I did with the WXGA screen, but you may end up being money ahead just getting an OEM replacement. However, if you feel like going through the effort of finding an equivalent replacement part, here are some tips that I learned the hard way!

Screen Dimensions and Resolution
Of course the most important thing is to ensure you get the right physical dimensions and screen resolution. A blog entry on icustompc.com explains the different types:

Standard Resolution

Typical Use
XGA (Extended
Graphics Array)
1024×768

[some 13- and 14-inch and most] 15-
and 17-inch LCD monitors
SXGA (Super XGA) 1280×1024

15- and 17-inch CRT monitors
17-and 19-inch LCD monitors
UXGA (Ultra XGA) 1600×1200

19-, 20-, 21-inch CRT monitors
20-inch LCD monitors
QXGA (Quad XGA) 2048×1536

21-inch and larger CRT monitors
WXGA (Wide XGA) 1280×800

Wide aspect 15.4-inch laptops
LCD displays
WSXGA+ (Wide SXGA plus) 1680×1050

Wide aspect 20-inch LCD monitors
WUXGA (Wide Ultra XGA) 1920×1200

Wide aspect 22-inch and larger
LCD monitors

XGA is typically what you'd find on old school standard aspect ratio screens in 13-, 14-, and 15-inch sizes, like you'd find on original Mac iBooks or this 1.5GHz Celeron Pavillion, or a Thinkpad T42, or other computers of this era.

I mistakenly bought a WXGA screen because the seller claimed it was for a ZE4900 laptop. It wasn't. I needed an XGA. Oops. Don't do that.


In some cases, the video card on your laptop may support a higher screen resolution than the OEM screen can deliver. For example, the Pavillion was perfectly happy driving the WXGA screen above, though it obviously didn't fit, physically.

Thickness and screw hole spacing is critical, too. You could try to find datasheets for other models and verify that the thickness and screw hole spacing is the same as what you have. I didn't have a lot of luck finding datasheets for LCD screens except for a pretty big collection of LCD datasheets here at beyondinfinite.com. Hope that helps in your search.

Connectors
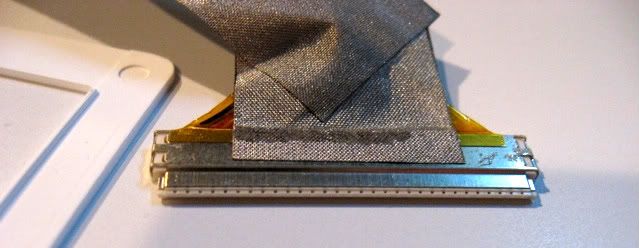
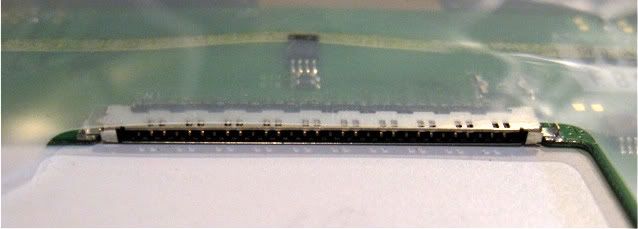
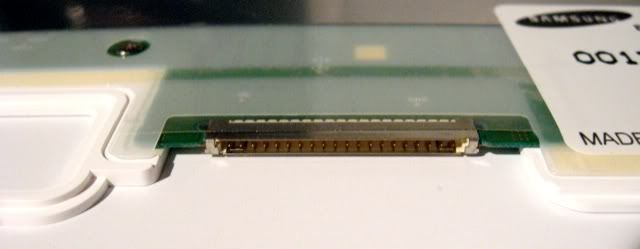
Also make sure the connectors are the same. Count the number of pins and look at the original connector socket on the screen to be sure.


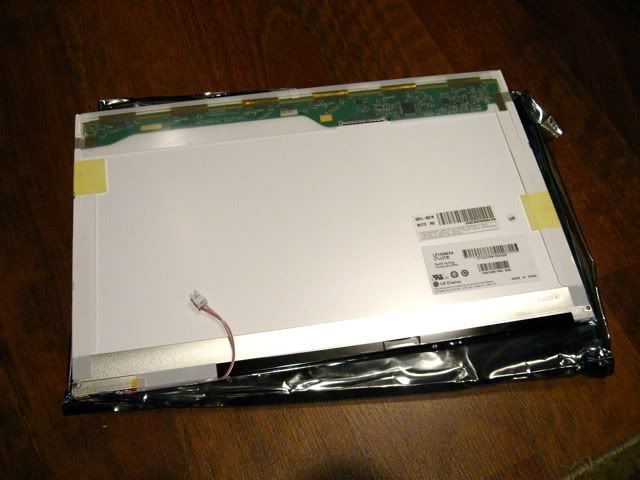
The screen I replaced had 30 pins as pictured above, but I mistakenly got another screen that only had 20 pins, pictured below. Oops. Don't do that, either.

I did find a website that sells various inexpensive adapters between different LCD screen connectors. So this is one option if you find a screen that fits physically but uses a different connector than OEM.

As far as I can tell almost all of these screens use the same power connector to deliver power from the inverter, a long, narrow printed circuit board mounted below the screen on the frame, which powers the cold cathode fluorescent lamp backlight for the LCD screen.

Installation

As all the technical manuals say, installation is the reverse of removal. :) You might want to test everything before you fully reinstall. And that's all there is to it. A nice simple, inexpensive fix.

Sure beats spending hundreds on a new laptop and you save another piece of useful electronics form the trash (not that you'd throw it away, would you?) while getting the most out of the energy spent to build the computer in the first place.

Friday, June 26, 2009

Fixing a heat gun better than before

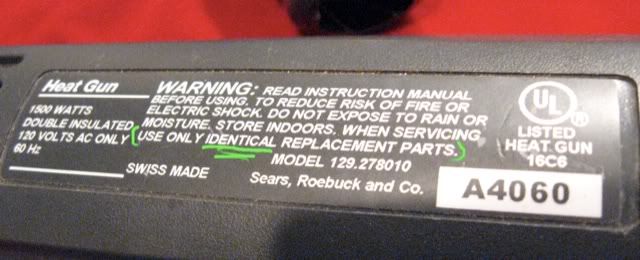
This heat gun was destined for disaster! Followed by a simple fix; I'm not a huge fan of fixes that require machinist skills. Partly because I don't have the skills or equipment but, also, I'd rather share simple fixes that anyone can implement so that more stuff is diverted from destination Dump.


I bought this über-fancy Craftsman heat gun a few years ago for heat shrink tubing since using a cigarette lighter was a really sucky tool for the job of applying heat. And of course, I couldn't possibly get the low end heat gun like my wife did for her crafts. No, I had to get the heavy duty version. It even says INDUSTRIAL on the side, so it must be good! (It is at this point that we roll our eyes...)

After a couple months, I dropped it and the heat control dial ceased functioning properly. It felt like something broke off inside. That really sucks for a $110 heat gun.

I could've lived with it stuck at one (wrong) heat setting. Or, I could've opened it up and set the internal potentiometer to a more usable setting but left it non-adjustable. Or I could've simply glued the broken bits together to restore it to original condition. But what fun would that be??

I suppose most people, faced with an expensive, broken heat gun, wouldn't have thrown it out at this point. Maybe they would've had it repaired, or ordered replacement parts, I don't know. That isn't really the point. By not only fixing it, but making it better than it was before, there's a good guarantee the thing will last a long time and stay out of the trash and give the owner their money's worth out of it. So hopefully I'll inspire you to seek to fix and improve your broken widgets and wingdings.

Sometimes stuff we buy isn't engineered very well, and this heat gun's temp dial was a great example. The large flat disc was molded with a spindly little shaft coming out that engaged with the potentiometer. When I dropped the heat gun, that shaft snapped clean off because it had no real reinforcement at it's base. Chances are, Sears sells replacement parts but I'd wager they'd be just as prone to break.

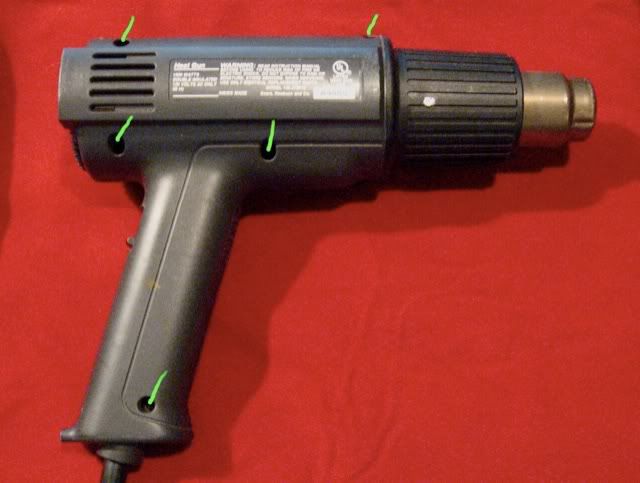
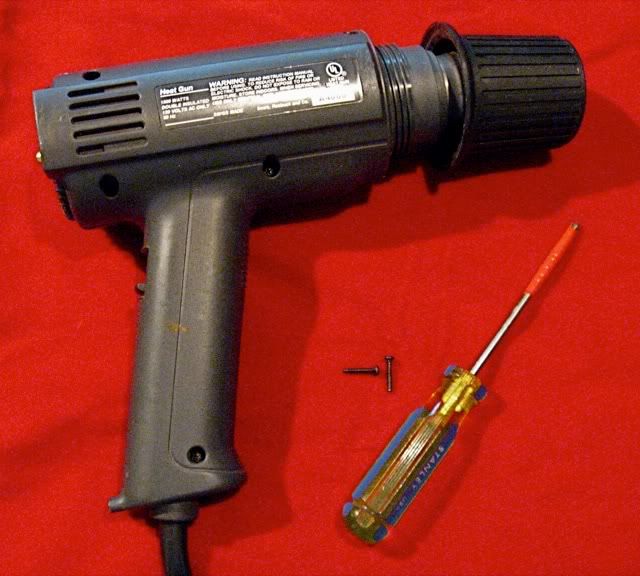
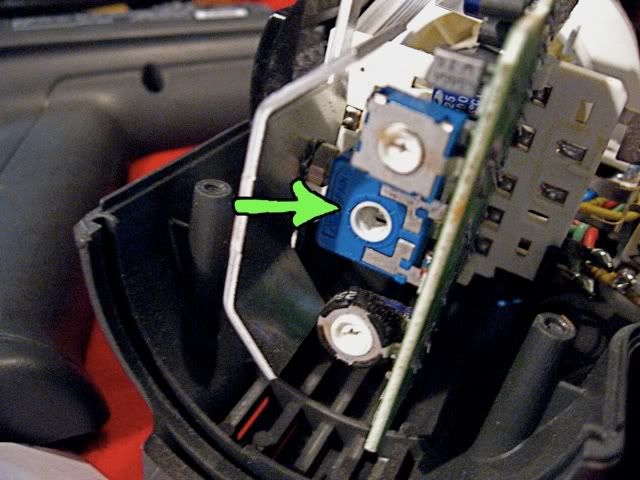
So I took it apart. There are a few screws on one side that come out with a Phillips screwdriver. Easy enough. You have to unscrew the heat shield before you can separate the halves of the heat gun. Once you do pull it apart you see some electronics, a little motor to drive the fan, the heat dial, and some other goodies. What I originally found was the broken shaft (I could hear it rattling in there before I took the thing apart).

The shaft had parallel flats on the end where it engaged the potentiometer.

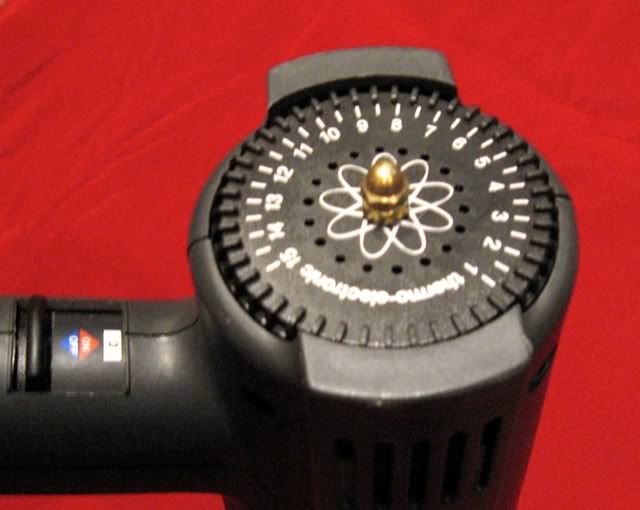
So instead of gluing the plastic shaft back in place, I decided to use a piece of threaded brass rod clamped to the dial with brass nuts. I chose brass because it is very easy to work with. I'd need to file down the flats and cut it to length. Brass is sufficiently sturdy and is kind of cool looking too.

I drilled a hole through the center of the dial, cut the brass rod to approximate length, then filed the flats by hand to fit into the potentiometer. Then assembled the dial, rod, nuts.

Then I put the dial back in place in the housing to test fit rod length. After adjusting for length using the nuts, I cut off the exposed end just long enough to put a fancy brass cap nut on it so it looks nice and holds the outer nut in place. A lock washer on the inside nut would've been a great idea. I've been using it for a couple years since the fix, it continues to work beautifully, and I am confident it'll hold up to all sorts of abuse.
Food for thought: another option would've been to use JB Weld or plastic compatible epoxy to reattach the shaft and also add reinforcement at the base. I like the brass better, but that's just me.